Understanding exposure is vital to any photographer wanting to remove the water-wings and start wading into the pool of manual operation of a camera. A few years ago, I wrote a primer on the law of reciprocity for my photography students. After I left the school, the post has been cooling its heels in my drafts folder. It might be of some use to new street photographers, so I bring it back now for anyone that may find it useful.
Exposure
From the dawn of photography, the camera has been little more than a light-proof box. Some are, of course, spectacularly advanced, but light-proof boxes nevertheless.
When the shutter opens, light travels into the box and falls onto a digital sensor, or onto light-sensitive film. An electronic, or chemical, reaction then occurs. This reaction, and often the resulting image, is known as the exposure.
Triangles
A correct exposure, whether on digital or film, is a balance of 3 key variables: Aperture, Shutter Speed, and ISO. This balance is often referred to as the law of reciprocity. Some call it the exposure triangle. When one element of the triangle is increased or decreased, another has to be changed in the opposite direction. Reciprocity. More on this later.
Aperture
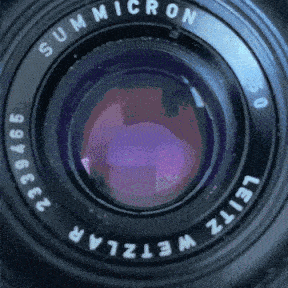
 The aperture of a lens is the opening through which light passes to enter the camera. It can be made smaller to reduce the light that travels into the camera. Alternatively, it can be opened wider to allow more light to flow through it.
Take a look at the lens attached to your camera. Notice the ring on the lens with numbers such as 16, 11, 8, 5.6, 4, 2.8, 2. Depending on how wide the lens can open, or how tightly it can close, there may be additional numbers on either end of the scale.
These are known as ‘f-stop’ numbers. What that actually means will come in later articles. For now understand that they are settings of the aperture of the lens. Counter-intuitively, the higher number represents the smaller openings, and the lower numbers represent wider apertures. As they are actually fractions – that’s for later – they are often written as f/16, f/11, etc.
 On most modern cameras that communicate digitally with the lens, the aperture may be controlled with buttons on the camera and the choices made viewed within the viewfinder. On manual cameras, the aperture is controlled by turning the ring (pictured above) on the lens itself.
Before we move on, set the aperture on your camera to the lowest number, the widest setting. Now look into the camera through the lens (see gif on the left). Turn the ring to the highest aperture number – the smallest setting – and look again. You should see the blades have closed in to reduce the size of the aperture.
Shutter Speed
 This variable is somewhat more self-explanatory. The choice of shutter speed will control how long the shutter will remain open when tripped. It really is that simple.
Take a look at your camera. On my Leica M6, the dial has the following shutter speeds:
1s, 1/2s, 1/4s, 1/8s, 1/15s, 1/30s, 1/60s, 1/125s, 1/250s, 1/500s, and 1/1000s.
Just like aperture, the shutter speed controls how much light can travel into the light-proof box. It does so by controlling how long the camera is open; how long the light-sensitive material is exposed.
It stands to reason that when the shutter remains open for 1 second, it will allow more light to pass into the camera and fall on the film or sensor, than if the shutter remains open for only 1/500th of a second.
Most cameras have a dial on the body to control the shutter speed. Some digital cameras have buttons on the back, near the screen, that allows control. In these models, the current setting can be viewed through the viewfinder, or on an LCD panel on top.
ISO
 Finally, the third side of the Exposure Triangle, the ISO. This one is a little tricky to explain but as there will be a deep-dive later in this series I will simplify here. The ISO is the sensitivity to light of the film, or the digital sensor.
The higher the ISO rating or setting, the higher the sensitivity to light, and the less light is required to fall on film or sensor to adequately record the image. The lower the ISO, the less sensitive the film or sensor is, and the more light is required to adequately record the image.
Lower ISO settings will require more light, however, will provide clear, clean images, whereas higher ISO settings will require less light but will pepper the image with digital noise, or more pronounced film grain on analog (though this needn’t necessarily be a bad thing).
On digital cameras the ISO, or sensitivity of the sensor, is often available from on-body controls, though occasionally it is necessary to delve deeper into the camera’s menus and settings. With analog photography, of course, the ISO is dictated by which film has been loaded into the camera.
Many digital cameras can reduce sensitivity as low as 25 ISO or as high at 6400 ISO, however, most often used settings are 200, 400, 800, and 1600. For analog, films come in a selection of ISOs. I most often use 400 ISO rated film.
The Light Meter
Modern digital cameras have an on-board light meter, and many modern analog cameras have them too. Older film cameras with no meter may force you to use a hand-held meter. There are different types of meter that gauge in different ways, but for your purposes all we need to remember is that the light meter will read and gauge the light entering the camera. It will report whether the photograph is underexposed, overexposed, or correctly exposed. Based on what the light meter shows, you can make decisions on whether to let more light in or reduce the light flowing into the camera.
The Concept of Stops
One extra explanation that may help for now. Each step of the aperture as listed above is known as a ‘stop’. We can stop up, or stop down the aperture. Moving from f/16 to f/8, we are moving 2 stops down. This terminology often also travels over to shutter speed. Moving from 1/125 to 1/500, we are moving 2 stops up.
The Exposure Triangle

How it works
As you can see from the illustration, when one variable of the triangle is increased or reduced, another has to be moved by the same distance – or number of stops – in the opposite direction to maintain a balanced exposure. This is the law of reciprocity.
Example 1 – Choosing the shutter speed as a creative choice with the aperture to compensate.
Let us say the camera is set to 200 ISO, with an aperture setting of f/11 and a shutter speed of 1/125.
The shutter speed needs to be reduced to catch a fast moving subject frozen in motion – let’s say during a sports event. Reducing the shutter speed means less time for light to travel into the camera.
To maintain a balanced exposure, then, the aperture could be opened wider to allow more light to flow into the camera in the reduced time.
The revised camera settings would now be 200 ISO, with an aperture setting of f/5.6 (2 stops wider) and a shutter speed of 1/500 (2 stops faster).
Example 2 – Choosing the aperture as a creative choice with the shutter speed to compensate.
Let us say the camera is set to 200 ISO, with an aperture setting of f/2.8 and a shutter speed of 1/1000.
The aperture needs to be tightened to widen the depth of field and ensure more of the field of view that is in front of – and behind – the subject will be in focus. (More detail on this in the future aperture article). Reducing the aperture will allow less light to flow through into the camera in the very short 1/1000 shutter speed.
To maintain a balanced exposure, then, the shutter speed could be reduced to allow more time for light to flow in through this smaller opening.
The revised camera settings would now be 200 ISO, with an aperture setting of f/11 (4 stops smaller) and a shutter speed of 1/60 (4 stops slower).


